Announcing FLUX.1 Kontext [dev] Inference & Training

![Announcing FLUX.1 Kontext [dev] Inference & Training](/content/images/size/w2000/2025/06/Group-316121752.png)
Open-weights, Fast Inference and LoRA Support
Following last month's successful launch of FLUX.1 Kontext [pro] and [max] models, we're excited to announce the release of BFL's FLUX.1 Kontext [dev] with open weights. This new version delivers exceptional performance with immediate fast inference and LoRA training support through fal's platform.
tl;dr
✨ Up to 4x faster inference (2s vs 7s)
💰 Ultra-affordable at $0.025/megapixel (gets cheaper with volume, contact sales@fal.ai for volume discounts!)
🔧 Full LoRA training + inference support
🎯 Game-changing image editing capabilities, no compromises on quality
Performance That Sets New Standards
The FLUX.1 Kontext [dev] inference endpoint has been heavily optimized by fal’s proprietary inference engine. Editing an image on FLUX.1 Kontext [dev] takes less than 2 seconds vs ~7 seconds for Kontext [max], near 4x faster!
Not only is it faster, but [dev] is cheaper as well: 0.025 per megapixel. Fast, cost-effective and reliable: the fal promise.
Open Weights → Open Functionality
Kontext is truly an amazing model. It pushes the state of the art of what was possible with a image editing. However, even great models have their limits. Kontext, for all its strengths, struggles when asked to perform edits that fall outside its training distribution. With heavy hearts, we must report one such failure: it cannot reliably transform portraits to feature "broccoli hairstyles."

Clearly the instruction “change to broccoli hair style” was not in its training data. This is where open weight models shine. By fine-tuning on additional data, we can close this crucial functionality gap, and properly create a classic Gen Z hairstyle.
To enable new photo editing capabilities, we can use the newly launched Fal FLUX.1 Kontext [dev] LoRA trainer and LoRA inference.
After collecting start and end image pairs, you can train a Kontext LoRA to actually create the broccoli hairstyle.
We’ll walk through the steps in more detail below, but checkout the final result of what training can achieve. What a time to be alive.

Step 1: Collect the Data
The most important part of training is the data. For training Kontext, we need three things: an initial image, an edited image and the prompt with the editing instructions.
It is usually easy to collect either the initial or final edited image, but having instructed edited pairs in the wild can be difficult. Luckily, we can use a trick to bootstrap our dataset generation by running the “edited” images through FLUX.1 Kontext itself.
In this case, we can’t edit to a broccoli hairstyle, but we can use Kontext to edit from a broccoli hairstyle.
So we start by generating a bunch of people with broccoli hairstyles using FLUX Pro. Then we use FLUX.1 Kontext Max to edit the broccoli hairstyle to something else.

We now have pairs of from broccoli style to other styles. To get the pairs we want, something to broccoli, we just reverse the order.
We are now ready to make our dataset zip archive. We just have to be sure to name everything correctly.
For each pair should have the same root name and end with either _start.EXT or _end.EXT. So our first image pair could be
01_start.png01_end.png
In our case, 01_start.png will be a normal hairstyle, and 01_end.png will be the broccoli haircut.
We can also add a instruction prompt file 01.txt, however it is often easier to the default_prompt training field vs a per pair instruction prompt.
In this case we can just zip the collection of start and end images, which is what we will do.
Step 2. Start Training
We are know ready the use the flux-kontext-trainer.
Here are the options:
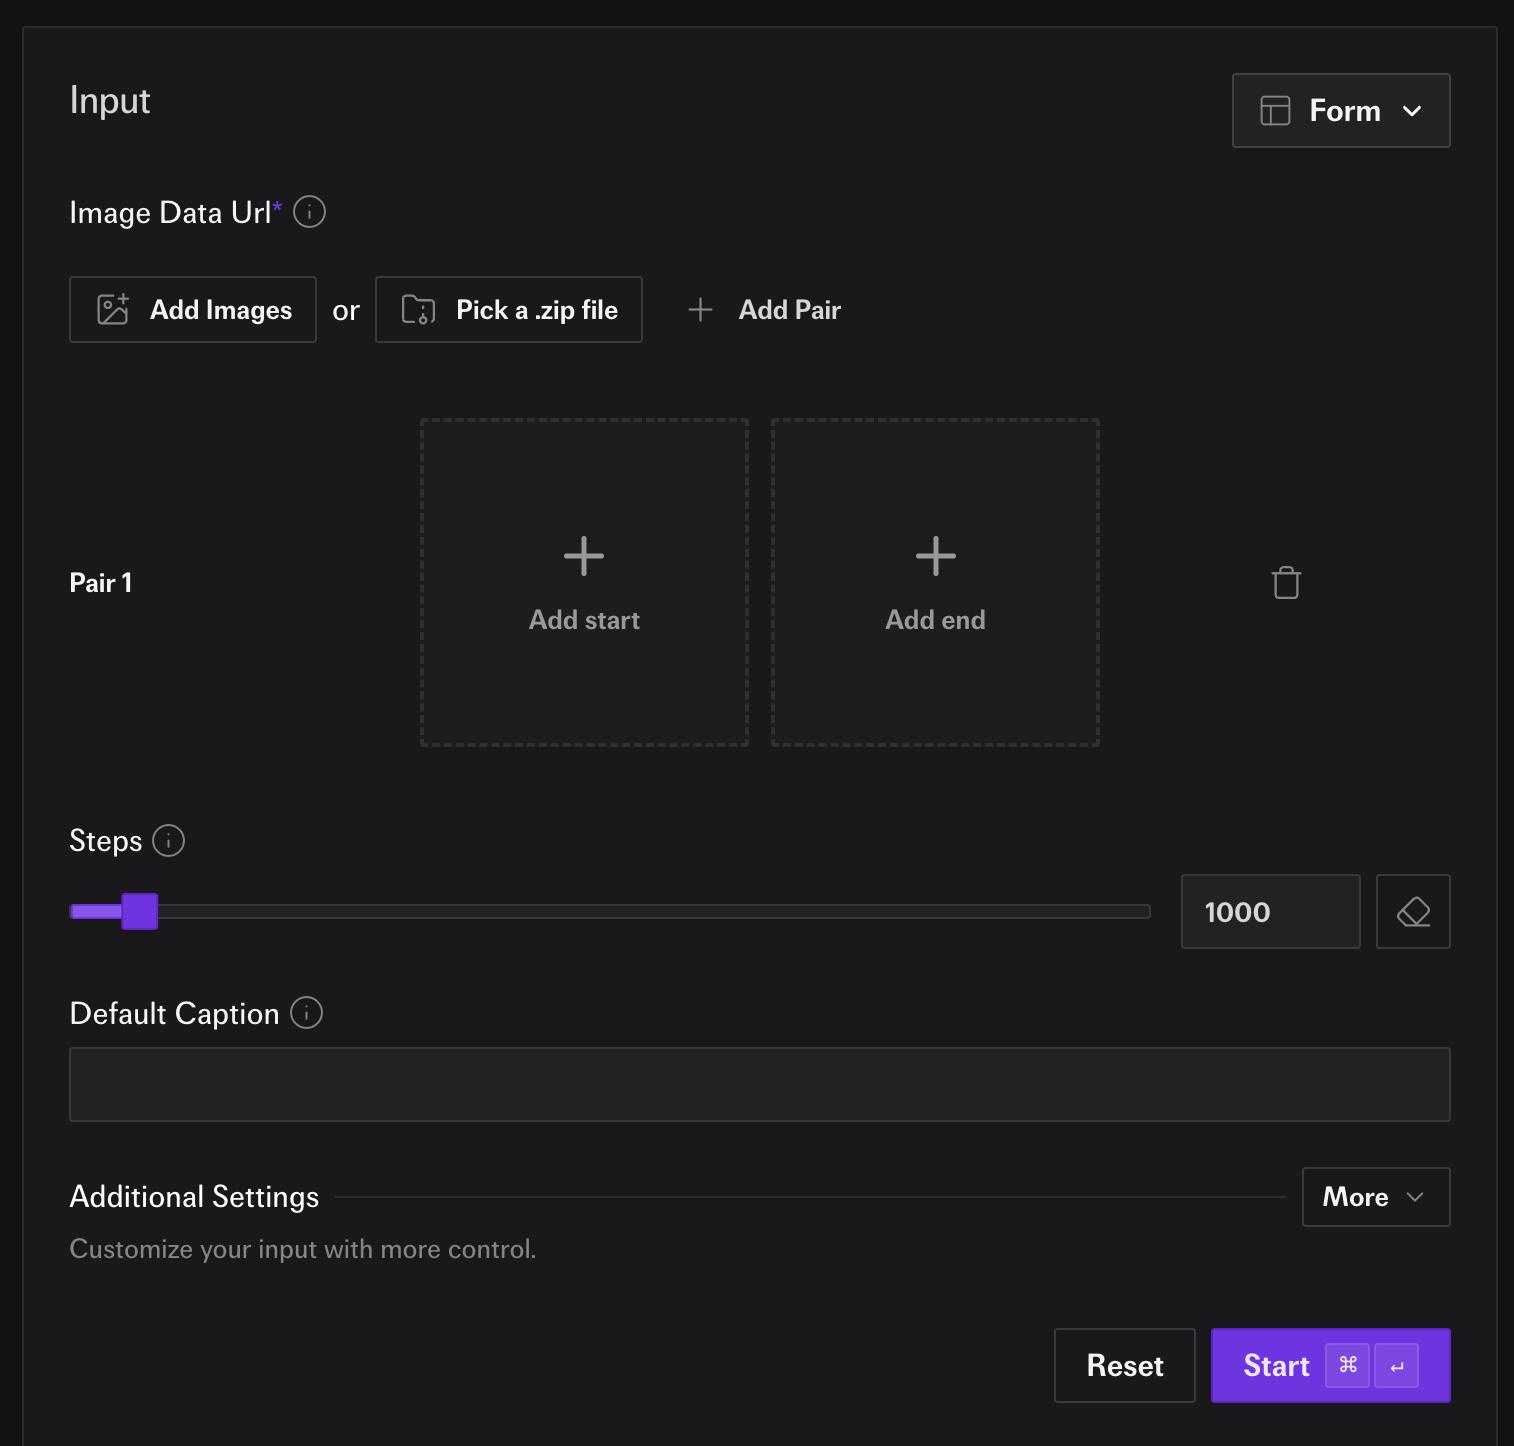
We are going to set two options.
First, we click on “Pick a .zip file” and choose the dataset we made in step 1. Then we fill out the “Default Caption” for the instruction we want. In this case we will use “Change to the hair broccoli haircut.”
Now we are reach to hit “Run”. We could change the epochs or set the steps instead, but we will leave the defaults as the are.
Step 3. Wait
…
Step 4. LoRA Inference
Once the training is finished we are ready for inference. Click on the “Run inference” button for our training and we will get taken to the FLUX.1 Kontext [dev] LoRA inference endpoint. The LoRA should be already filled in. All we need to do is add an image and we hit “Run”.
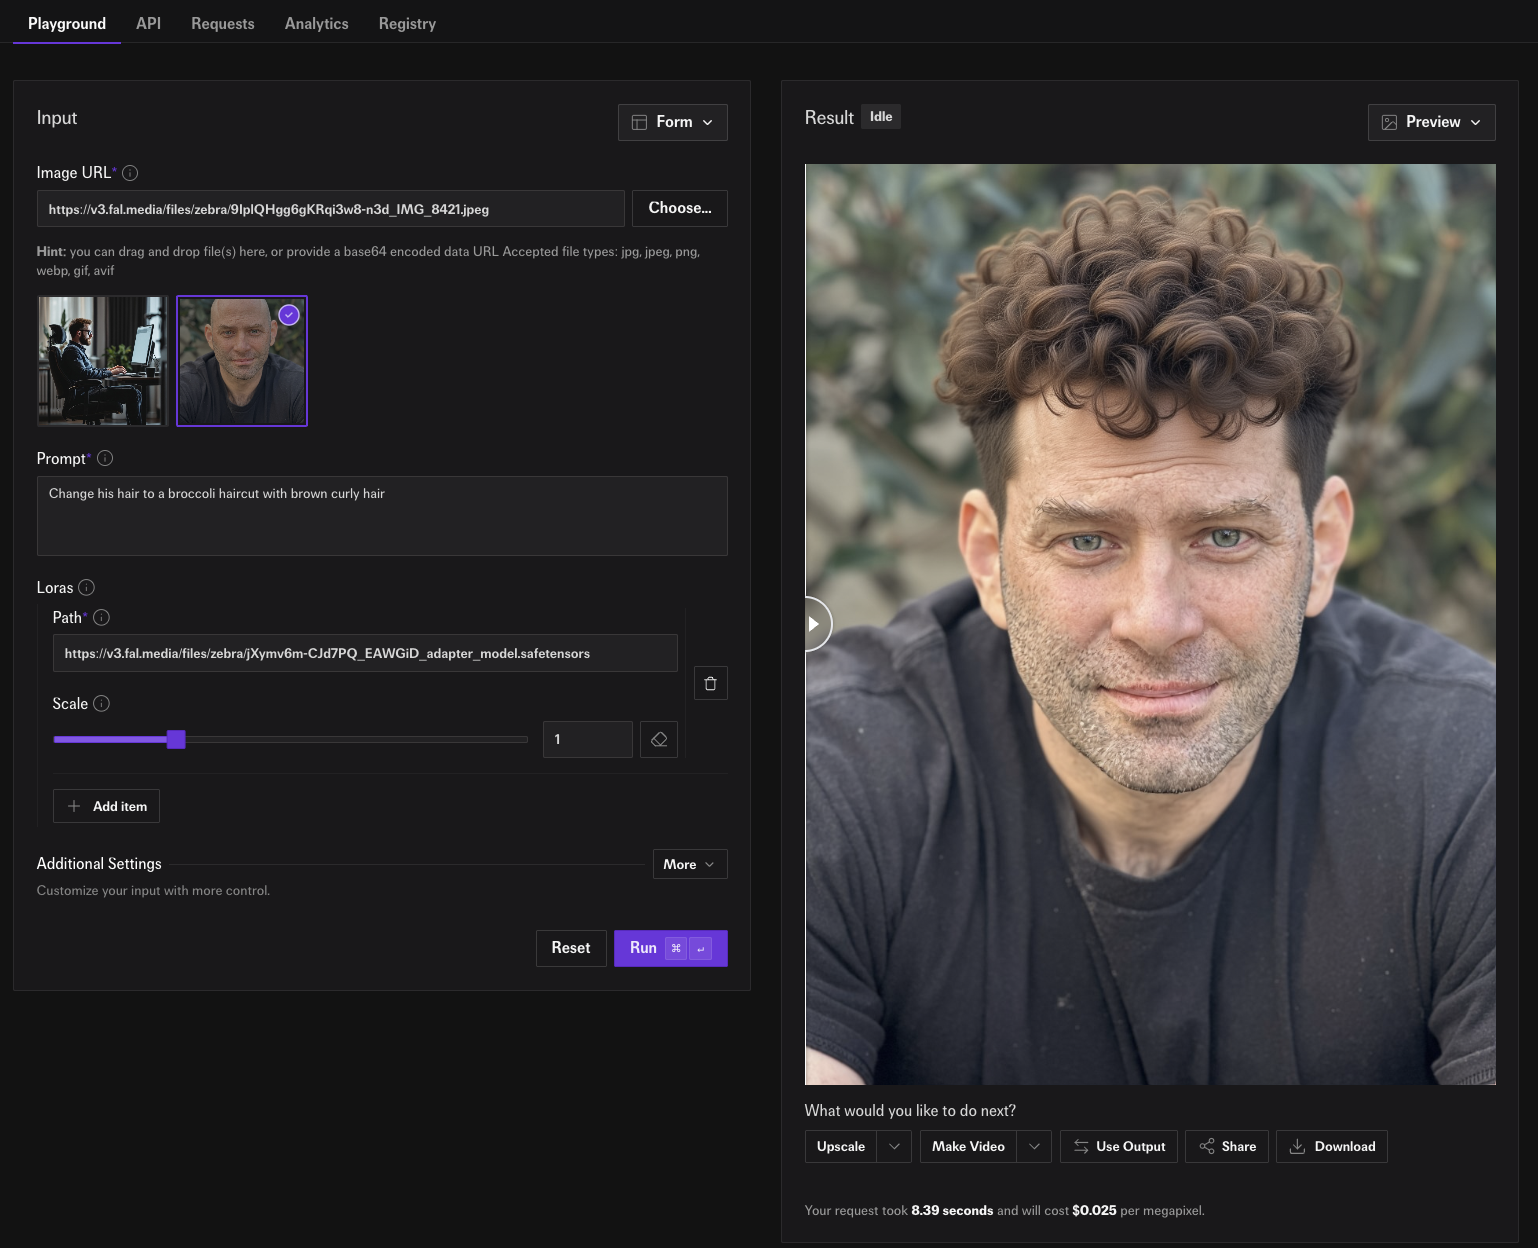
Try it yourself here!
More Examples
We trained a few other LoRAs to help inspire people
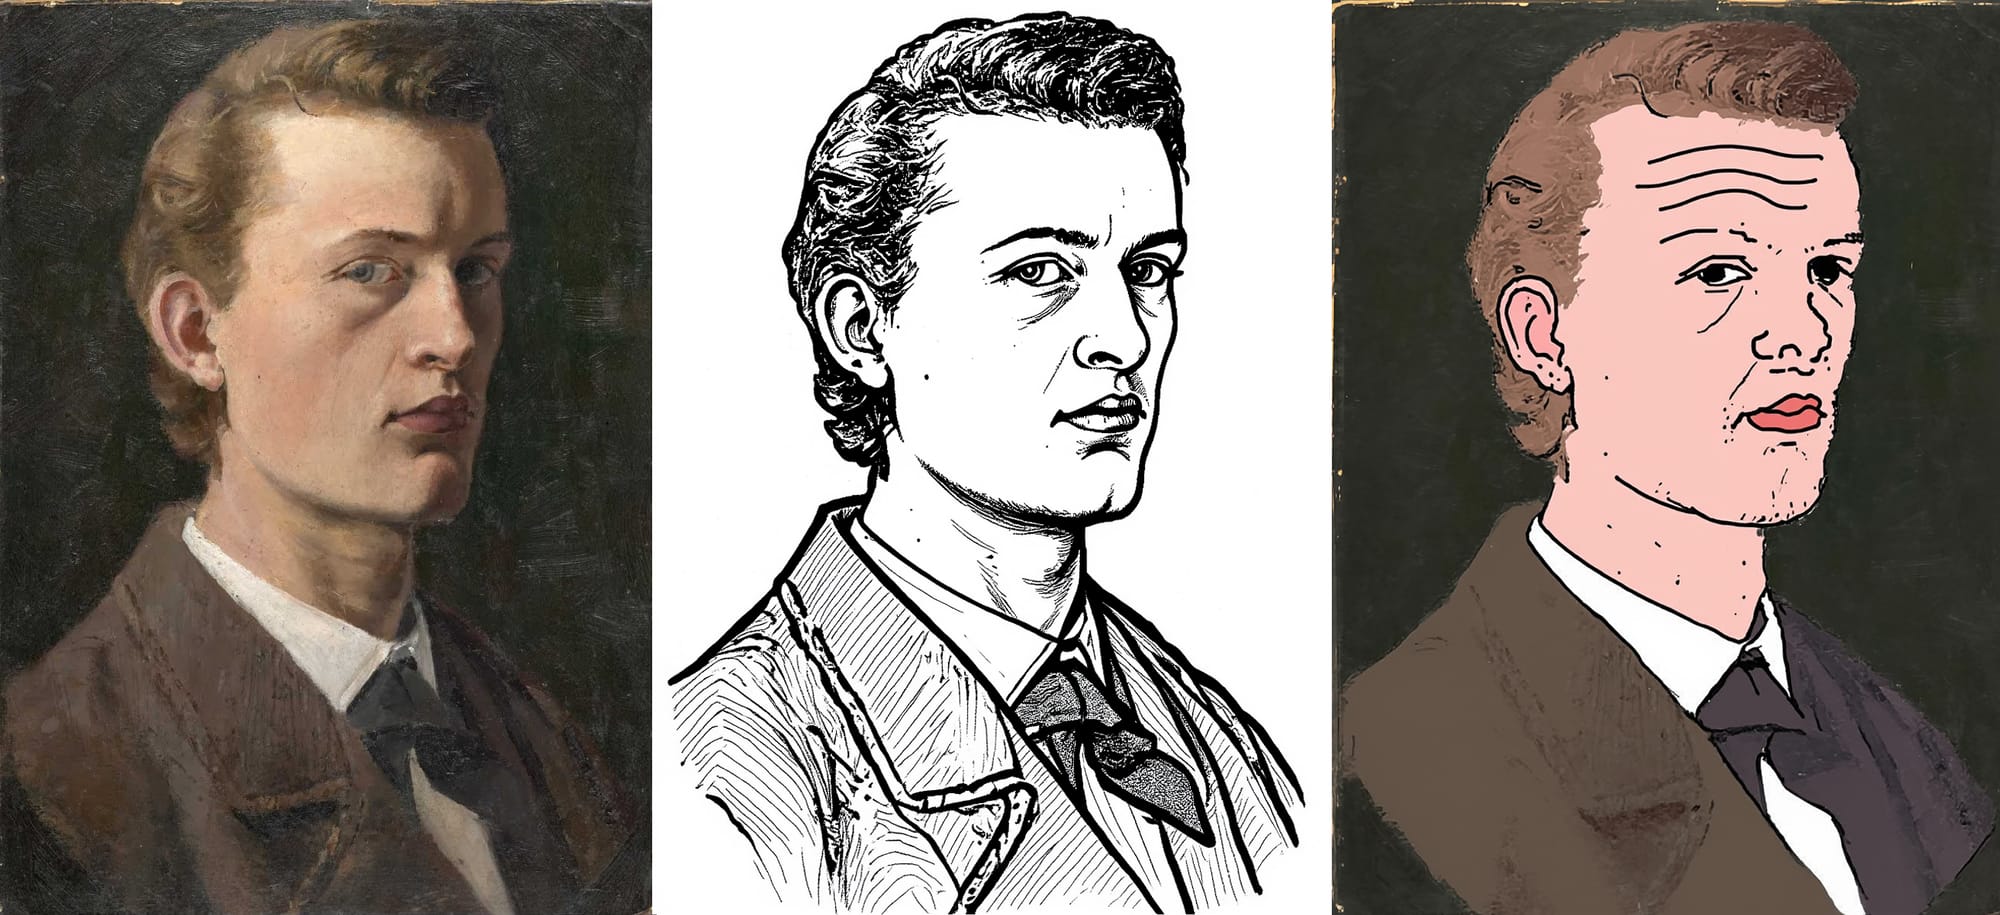
Wojakify
Wojak style is something Kontext initially struggles with, but not anymore. Share link.
Plushify